Sass tutorial: all you need to know to get started with CSS preprocessing
Note: This article assumes that you know what CSS is. If not, checkout this splendid tutorial introducing the CSS and HTML to you.
Note: This article assumes that you know how to use the Command Line, at least a little. If not, please check this post to get started.
Sass – flexible CSS
Today we will take a deeper look into one of the CSS preprocessing languages – Sass. Why should you use it? How? When? All answers here.
But first things first: what is Sass? In one sentence: more flexible and “easier” way to create CSS files. And you will see what do I mean in just a second. Hang on.
First impression
Consider a standard CSS file – a series of directives defining how the HTML elements should look. For example:
p {
 font-size: 1em;
 color: gray;
}
a {
  font-size: 1.2em;
  color: red;
}
p.different {
  font-size: 1.2em;
  color: red;
}
“Snippet A”
Usual CSS for a web-app or website will probably be more advanced, but this one is sufficient for the next point I want to make: this CSS is a perfectly valid Sass script! That’s right, take your existing CSS, copy into a .scss file (a standard file for the Sass code) – e.g. test.scss – and you will have a functioning script.
So what?
Wait a second! Here comes the magic:
$main-color: gray;
$different-color: red;

$main-size: 1em;
$different-size: 1.2em;

p {
  font-size: $main-size;
  color: $main-color;
}

a {
  font-size: $different-size;
  color: $different-color;
}

p.different {
  font-size: $different-size;
  color: $different-color;
}
“Snippet B”
You see, we have defined the variables (they are prefixed with “$”). In this simple example – for the colors and font size. But you can define virtually any css values as variables.
Why is this useful? A usual CSS stylesheet may have hundreds of properties: color, font-size, font-style, border styles, you name it. And more often than not, you want to have them all consistent, to follow some theme or design. And more often than not you will find a good dozen of places repeating the same color for example. What if you decide to adjust that color? You have to change it all-over the stylesheet or even worse – multiple stylesheets. If you have a single place to define such variables – the task gets much easier.
That is cool, but how do I use it?
A great question! We still want to use our HTML and CSS, how does this Sass come into the play?
Differences in the workflow
To incorporate Sass in your development process, you will need to generate a CSS file from your Sass file. Some may prefer the word “compile”, since the Sass interpreter will go through the Sass code we write and compile it into the CSS file that our HTML page can understand.
For example, a code above would be compiled into the following:
p {
 font-size: 1em;
 color: gray; }

a {
  font-size: 1.2em;
  color: red; }

p.different {
  font-size: 1.2em;
  color: red; }
“Snippet C”
As you can see it is exactly what we wanted to achieve in the “Snippet A”!
However, we have introduced some differences compared to the usual way of creating HTML and CSS files:
a) Usual workflow:
- Create your HTML and CSS files
- Include CSS into HTML.
b) Sass workflow:
- Create your HTML and Sass files
- Generate CSS files with Sass
- Include CSS into HTML.
As you can see, there is one additional step in the workflow, however you get all the goodies of Sass. And I will help you to get that additional step done. I have described how you install all needed tools and how you use them in a great detail below. But before digging into that, let me show you some more of those Sass goodies. Is that ok?
With Sass you can do more!
Another great thing with Sass is that you can define functions. They are called mixins. They can take parameters, like size in pixels, color names and other values used to define CSS properties. Let’s take an example to see why it is useful.
Say, you want to create divs with different background sizes:
div.with_cover {
  -moz-background-size: cover;
  -o-background-size: cover;
  -webkit-background-size: cover;
  background-size: cover;
}

div.with_contain {
  -moz-background-size: contain;
  -o-background-size: contain;
  -webkit-background-size: contain;
  background-size: contain;
}
“Snippet D”
For me as a developer, that looks non-DRY (DRY stands for Don’t Repeat Yourself if you didn’t know). What you could do with Sass is the to define and use the following mixing:
@mixin background-size($bgSize) {
  -moz-background-size: $bgSize;
  -o-background-size: $bgSize;
  -webkit-background-size: $bgSize;
  background-size: $bgSize;
}

div.with_cover {
  @include background-size(cover);
}

div.with_contain {
  @include background-size(contain);
}
“Snippet E”
Surprisingly (or not) the generated CSS would be exactly the one we wanted to have in the “Snippet D”. However there is much less clutter in the code, isn’t it?
You can find a few useful mixins here. If you need a quick “fix”.
Even more though, you could use a special library called Compass. With it, you wouldn’t need to define your own mixins like background-size() above. It is already defined in Compass and is more powerful than a simple one we have defined here. Since installing, understanding and using Compass requires some effort, I will write a post about it in the future. In the meantime you can check the documentation on the official Compass website.
Personally, I use the Sass due to the reasons mentioned above. However there is much more to Sass – features like nesting, inheritance or operators. Hope you got interested enough to explore it later on your own at the official Sass guide. And now it is time to install it on your computer!
Installing Sass
Since we are trying not only to learn Sass but also explore the Command Line tools in a more details here, I will describe how to install Sass using your Terminal of choice.
First, Sass is a program and therefore it needs to be installed. Second, it is written in a Ruby programming language. Therefore to use Sass, you will need to install the Ruby library. Even if you don’t know what Ruby is, don’t worry. You just need to know that when we install Ruby library we install a special Command Line program that will allow you to install and use Sass. The process will look like this:
1. Install Ruby
2. Install Sass (using Ruby!)
3. Go ahead and use Sass!
Let’s start.
1. Install Ruby library
This is done differently depending on which platform you are using – Windows, Mac or Linux. Since I don’t know what you are using, let me just describe it for each platform:
Windows
Windows users should use the Ruby installer. Just download and install it. I would choose the latest version (2.2 at the moment of writing), since when I used the 2.1 version, I got an issue with certificates preventing the installation of Ruby.
The Ruby installer comes with a separate command line tool, but you can also use the usual Windows Command Prompt to run Ruby and Sass. For that, just tick the checkbox for adding Ruby into the PATH, when installing. Like this:
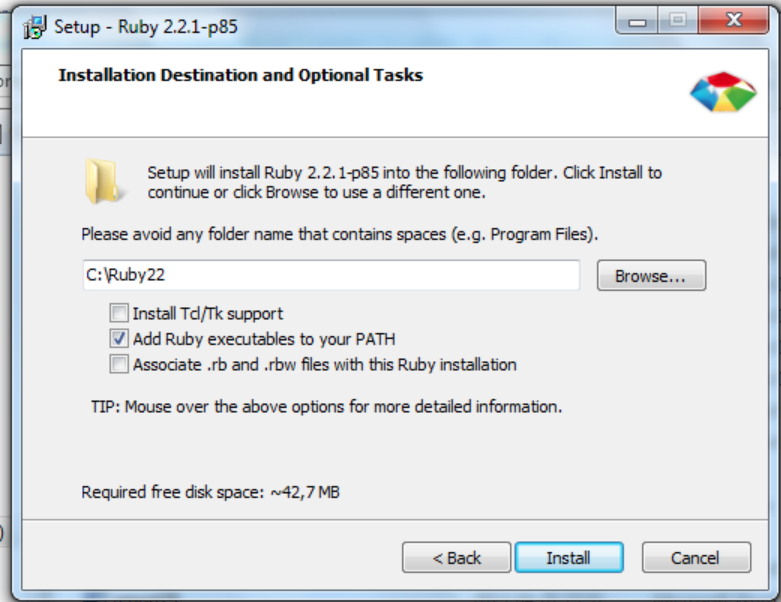
Installing Ruby on Windows
Mac
Everyone can envy you, my dear Mac users. You already have Ruby installed! But if you want to do something at this step too, you can upgrade your Ruby installation to the latest version using the instructions here. However I wouldn’t bother at this moment.
Linux
You can install Ruby as any other program on Linux – with the package manager (depending on the distribution you are using) or using more specialised tools like rbenv, or rvm.
I know you guys, using Linux, like to explore things yourself, so I will not go into more details (and really there are not so much more to tell). As a quick example of installing it on the Ubuntu or Debian, you would run the following command:
sudo apt-get install ruby-fullCheck it!
To ensure that Ruby was installed correctly, you can start the Command Line and run the following command:
ruby -v
This should show you the current version (that’s what “-v” stands for) of the Ruby library installed. At the moment of writing my version of ruby is the following (you will probably see a little different, but similar string):
ruby 2.1.3p242 (2014-09-19 revision 47630) [x86_64-darwin14.0]
2. Install Sass
This step is done using Ruby library that we have already installed in the previous step. We will call a special Ruby Command Line program (it was installed as a part of the previous step) called “gem”. To install Sass, run the following in the Command Line:
On Windows:
gem install sass
(I managed to install it running a usual instance of Command Prompt. But if you get issues during the installation, try running the Command Prompt as Administrator)
On Mac:
sudo gem install sass
On Linux:
sudo su -c "gem install sass"
After the installation is complete, you can check if it was successful by running the command
sass -v
This will show you the current version of Sass.
3. Use Sass
After the installation process above is complete, you are ready to use Sass. Congratulations!
The first and simplest thing to do is to grab one of the examples above and copy it into the file that you create, for example test.scss (i.e. it should end with .scss extension). Just in case: I have created a Github repository with small examples discussed in the article. Say we take this one:
$main-color: gray;
$different-color: red;

$main-size: 1em;
$different-size: 1.2em;

p {
  font-size: $main-size;
  color: $main-color;
}

a {
  font-size: $different-size;
  color: $different-color;
}

p.different {
  font-size: $different-size;
  color: $different-color;
}
“Snippet B” (again)
Now we need to compile it into a CSS file. In your Command Line navigate to the directory where you have the file test.scss you created above. From there run the following command:
sass test.scss test.css
This will create a “test.css” file with the following (or very similar) content:
p {
  font-size: 1em;
  color: gray; }

a {
  font-size: 1.2em;
  color: red; }

p.different {
  font-size: 1.2em;
  color: red; }
“Snippet F” (Compare with Snippet C!)
Cool isn’t it?
Now you can just edit your .scss file, add your styles, and then convert it into .css running the command above. Of course, the names of the files are of your choice – they don’t have to be called “test.scss” and “test.css”. The names of .scss and .css files don’t have to match either.
Just to be clear I will repeat: you will have to include the generated .css file into html document, like any other .css file:
<link rel="stylesheet" type="text/css" href=“test.css”>
Automate the compilation!
Now, you will not be editing the .css files anymore. You will be editing the .scss files. If you just follow steps above, each time you make changes to your .scss file, you will have to compile it “manually”. I.e. run the command “sass test.scss test.css” above.
That is a bit unproductive and I bet you will stop doing that after a while and come back to “usual” css editing.
To avoid that, you can tell sass to watch any changes you do to the .scss file and compile it into .css automatically. Just use the following command in the Command Line:
sass --watch test.scss:test.css
You can even watch several files or directory at once. No problems. However we want to be smart, huh? Thus we want to minimise the amount of .css files included into .html file (to minimise the amount of request to the server – but you know that, right? If not, I’ve just told you). I.e. more often than not, you want to have just one .css file as your output.
The easiest way to achieve that is to import all the different .scss files into a single, main, .scss file. Let’s see how.
Suppose you have several .scss files:
- variables.scss (it is a good idea to keep your variables in a separate file instead of scattering all-around)
- mixins.scss (general purpose functions)
- widgets.scss
- test.scss
Now, to import the variables.scss, mixins.scss and widgets.scss into the test.scss, just add the following lines on the top (well, if you want to overwrite the rules in the test.scss – then you can choose to import some files in other places of the file) of the test.scss file:
@import variables
@import mixins
@import widgets

/*
 * rest of your sass code
 */
“Snippet G”
Note, that you don’t specify the .scss file extensions in the @import directives above.
Now, if you run our watch command:
sass --watch test.scss:test.css
and then change and save any of the .scss files above, it will trigger an automatic compilation into the test.css file.
Want to be even smarter? You can also minimise the .css file that is generated! Just add an additional parameter to the watch call:
sass --watch test.scss:test.css --style compressed
If you generate the minimised CSS this way your webpage will load faster and your users will really appreciate that!
Of course, you need to run the watch command before you start the development. If you are finished with editing the Sass files for the day, you can close the watch command – either close the Terminal window or press the “Ctrl” and “C” on your keyboard simultaneously – this keyboard shortcut should stop the currently running “watch” program.
When to use Sass
As with any technology, you need to decide if it’s worth using or not. Basically, it depends on your project. If it is something quick and dirty, you probably can get away without using the CSS preprocessors. However whenever your project becomes at least a little bit more long-lasting, there are tremendous advantages of using Sass to make the maintenance easier. Start by just copying all your CSS into a .scss file. Add the structure, variables and mixins along the way! It’s that simple.
A few last notes
To finish it up and stand against possible critics, I need to add a few “other” things.
First, in this article I have told you about the “CSS-friendly” version of Sass. There is another version – it will use a bit different syntax to write the code. Why? Because that how it was developed originally. Sass syntax was resembling the CSS, but the rules of the code were different. Later on, the developers of Sass realised that people do not want to learn too much – the whole new Sass language. Therefore they adopted a new approach – just taking the same syntax CSS has and enriching it with additional features.
Probably, a big role in this shift was played by another CSS preprocessor – a close “competitor” of Sass called Less. They have used the CSS-like syntax from the very beginning thus allowing them to be adopted by developers quicker and easier.
In terms of features both Sass and Less are quite similar and you will be doing good using any of them. I would even argue that you will be able to switch between them quite easily – say you work with Sass on your own project but then join a team working with Less already – it will be relatively straightforward.
Personally, I am inclined towards Sass a bit more, since I like the possibility to use the Compass library mentioned above. Less developers have some tools to pair that – Less Elements and Compless however they are not as evolved as the Compass ecosystem. I am planning to write a similar intro post about Less too – then you will be able to compare both tools yourself!
In the meanwhile you can take a look at the examples discussed in the article at the Github repository.
Conclusion
Great, today you have learned to install and use Sass. Hope you liked our Sass tutorial – if so, please share it! Any questions? Ask in the comments! And stay tuned for future articles (Facebook and Twitter). We have lots of topics to cover!


Leave a Reply