Hybrid apps with Phonegap and beyond – an introduction
What are hybrid apps?
First, let’s figure out what a hybrid app actually is.
Most often it could be described in this way:
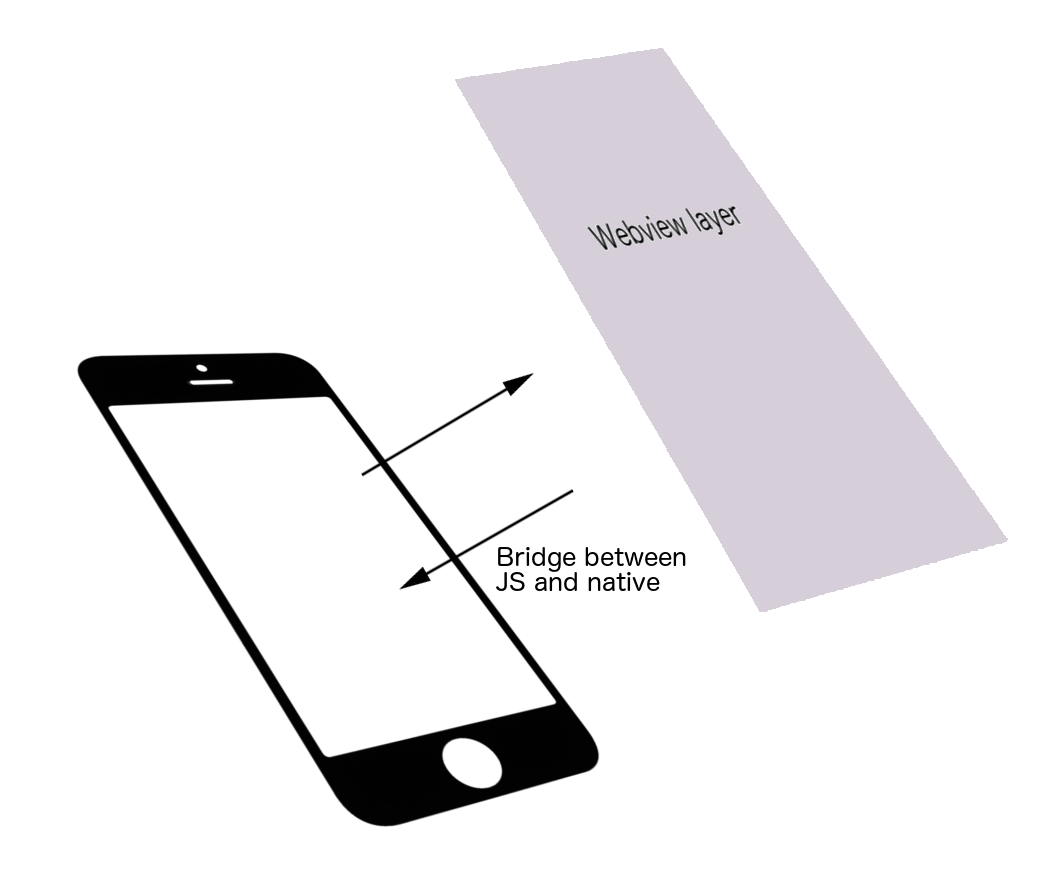
It is an app created with web technologies – HTML, CSS, Javascript. This app is displayed in a native WebView layer. It has access to the native functionality. It can be distributed via an App store as a native app. It can be Google Play, Apple AppStore or any other. And finally, it feels like a native app.
I think the last part – feeling like a native – needs some attention.
What makes an app feel native?
Thing about it for a moment. What can make your HTML page look like an app and not just a usual webpage? There are a few things.
First, it should have nice transitions. When the page is loaded, it should not turn white first (like a usual website). Moreover, if something is taking longer to load, a visual hint should be provided. For example, a rotating spinner.
The app should be responsive to the user interaction and input. It should support touch events in contrast to the usual click events of webpages.
Some may argue that the app also needs to look like a native app. However in my opinion this is optional. If you want your app look as if it is using native UI components, you are better off making it native from the start. And if you go with a hybrid app it is better to create a custom branded outlook that is similar on all platforms, perhaps with some exceptions where it’s absolutely necessary.
Why do you want hybrid apps at all?
The biggest advantage you get is the ability to support multiple platform with one code base. You write your code once and can support iOS, Android, Windows Phone and some other platforms.
Another big advantage, at least for the web developers, is the ability to use the tools you already know – HTML, CSS and Javascript. This way you can utilise existing knowledge in the team without bringing additional developers onboard.
Furthermore, more often than not your project will have a corresponding website. Perhaps even a mobile version. If you do it in a smart way, you can utilise the content that is used on your website and even the code of your website. This is a complex topic though and is out of scope of this introduction. I will return to it in the future though, so stay tuned (e.g. via FB or Twitter).
One more advantage of the hybrid app development is an ability to utilise the code created by community. For example, if you use the Phonegap/Cordova framework (I’ll talk about it in a second), there is a number of readily available plugins that allow you to add Push Notifications, In-App Purchases and other native elements into your app.

All of the points above boil down to one more advantage: you can save your development time and money. Of course, you need to be smart here. As said, if you aim to re-create the native look of the app with your HTML – who knows, perhaps you’ll waist that precious time and would be better off going native.
What do you give up?
Everything comes with a price. Even though you get lots of benefits, there are a few things you loose if you choose hybrid approach.
First and most obvious is the Look. However you strive after, you will not be able to make your app look 100% native on all platforms. And as we have discussed you shouldn’t. If your customer requires the app to look native – go native. What you can do with a hybrid approach though is giving your app a solid branded outlook and ability to use it smoothly.
Second disadvantage is a lack of easy debugging of packaged apps. There are some ways to work around it, however simply following the execution line after line is not always possible.
Third, it is easier to make a high performing app with native components. However it is not granted with the hybrid approach. You have to optimise your app and some techniques that suffice for usual web development will not be enough. In some cases you may need to give up on using a hybrid approach: if you want to create a 3D game for example. Use web technology for data-driven apps. Use native for cutting-edge performance in the games and other specific cases.
On a side note, one of such cases is a map functionality. Once we needed to create an app that displayed a map to the user. The solution that we have chosen was the following. The app was made with web tools. For the maps however we opened an additional native view. This shows us that native and web functionality can also be mixed if needed.
Don’t forget that with the native route your development costs increase. In addition, you will have to code the same thing over and over again for each platform. And if it is done by different developers it will obviously be done in a different manner. For example, I could experience this “joy” with the map functionality mentioned above. And it is inevitable for each app that supports different platforms natively.
Now that you know advantages and disadvantages of both approaches, let me introduce you…
Phonegap and Cordova
Phonegap is a set of tools to make the hybrid web apps. It provides a bridge between your Javascript code and native functionality.
Originally, Adobe company started the Phonegap project. Later they donated it as an open source project to Apache under the Cordova name. However Adobe still has the Phonegap product which is built on top of Cordova and provides an additional set of services. For example, they offer an online build service and more recently – a desktop application helping you to create the apps.
Since I don’t use the Phonegap build service, I usually just use the Cordova project and its Command Line tools. Therefore later in this article, I will use the Cordova in the examples.
Installing Cordova
To install Cordova, you will first need another tool – Node.js. It is a special software, that allows you to execute Javascript code outside of the browser. The abilities of the Node are really broad – it even allows to create a server using Javascript.
For our needs we will just use Node as a helper tool. We will use its Node Package Manager (“npm”) to install software, in our case – Cordova.
So, as a step one, go ahead, download and install the Node.js program.
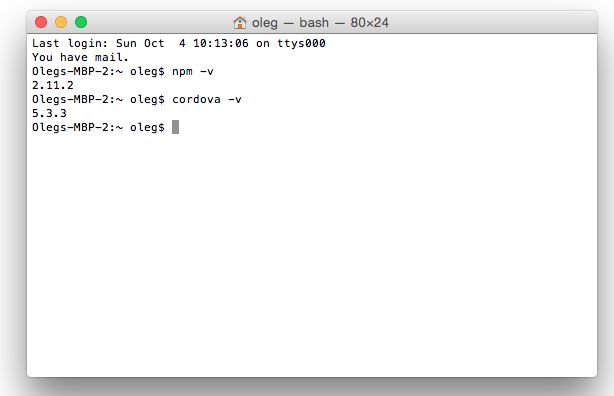
As a step two, start up your Command Line. If you don’t know how to use the Command Line, don’t worry – here is a tutorial that explains it to you. And if you are in doubt if you want to use it – here is the evidence that you do. Check if you have Node installed – execute the command
npm -v
It should output the version of the Node Package Manager. If it does not and you get some error – try re-installing the Node.
And the last step to install Cordova – type in the following into the Command Line and execute it:
sudo npm install -g cordova
As you can see, we install the software with a “sudo” command, since you need a super-user privileges to do that. Then it is followed by “npm install” command, telling the Node Package Manager to install Cordova globally (thus “-g”). You may be prompted to enter your password in order to execute this program.
That’s it. You should have Cordova installed by now. To check it, try the following command:
cordova -v
If it outputs a version of Cordova you are just fine. If you are getting an error – something went wrong. Try re-installing Cordova and check the Command Line output for any errors.
Cordova development flow
When you develop with Cordova or Phonegap, you will usually do the following:
First, you create your app with Cordova Command Line. As you will see in a moment, it is an easy part.
Second, you will actually develop the app with HTML, CSS and Javascript. This is a more difficult part. I will go over some challenges you may encounter, however I am planning to go much deeper in subsequent posts.
Probably you will also add a number of plugins depending on your needs. A good thing is that they are ready to use. However sometimes you will need to adjust the code to make it work as you intended.
Finally, when the app is ready you will submit it to the App Store of a choice. Even though it is developed with the web tools, the app can be distributed in the same way as any other native app. Of course, in some cases (e.g. Apple) it has to go through a review process. However if you have done it right (see the part about feeling as an app) you will likely not have trouble here.
Creating your first hybrid app
I think to understand what Phonegap/Cordova is it is best to try out an example. Therefore, start out the Command Line again and move into or create a directory for your Hybrid apps (not sure how? Check the Navigation part of the Command Line tutorial).
Create a directory for your project and move into it:
mkdir first_project
cd first_project
Now execute the following command:
cordova create . my.first.app LetsTest
This will create a skeleton for the app in the current directory. The app will be named “LetsTest” with identifier “my.first.app”. There are a few interesting files and directories created:
- config.xml – a configuration file
- plugins – a directory for plugins
- platforms – a directory for iOS, Android, Windows Phone and other platforms
- www – a directory where you will actually put your HTML, CSS and Javascript files
If you want, check the “platforms” directory created – it is empty. Now, we want to add some platforms that we are going to support.
Let’s start with iOS. Execute the following command in the Command Line:
cordova platform add ios
and for Android:
cordova platform add android
These two commands have created corresponding directories and projects inside platforms directory. You can go in, start a project of your choice and start the created default app in a simulator.
That of course requires that you are familiar with at least one of the platforms supported by Phonegap and it can be used on your computer. If not, you will have to install the needed tools before proceeding. Explaining how to do that in detail is out of scope of this tutorial. However here are a few links that will help you to get started: installing the Xcode for iOS development and installing the tools for Android development.
Adding changes to the app
Now you probably want to change the app. Let’s start with simply changing the text on the main screen.
Take a look at the top-most “www” directory mentioned above. There you have the main index.html file and directories for css, javascript and image files. In fact, you can organise the structure of the www folder as you want – it is here you create your web application. However it is important to keep the index.html file here, since it is this file that is loaded first by Cordova.
I usually edit these files by some other means than the tools used to develop the native applications. I.e. I do not use Xcode, Eclipse or Visual Studio for that. Instead I use a simpler code editor called Brackets. You can choose any code editor that you like.
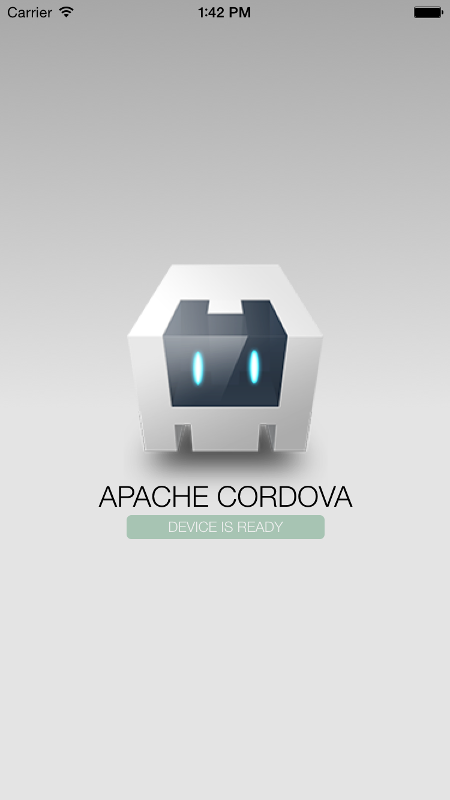
Let’s open and edit this index.html file. Find the following line (it may be a bit different in the later versions of Cordova):
<h1>Apache Cordova</h1>
and replace it with this one instead:
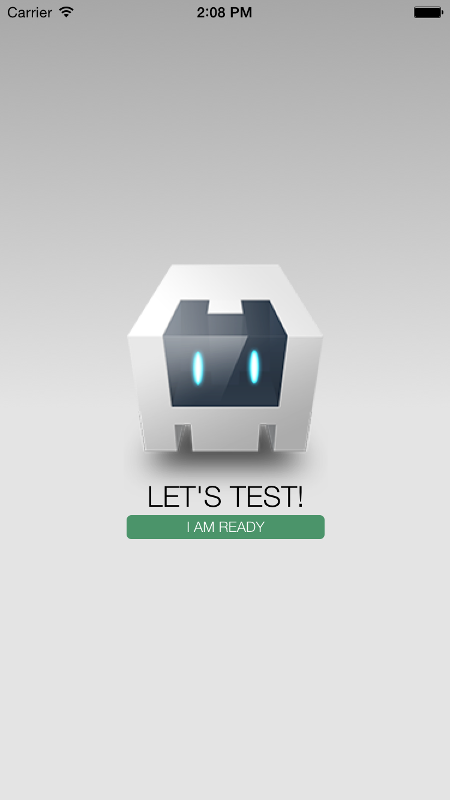
<h1>Let's Test!</h1>
I also suggest you change the following line:
<p class="event received">Device is Ready</p>
with the one that can make you proud of yourself:
<p class="event received">I am Ready</p>
Now that you have edited the index.html file in the top “www” directory, you want it to be used by the code in “platforms” directory. For that you need to make one more step – execute the following command in the Command Line (you should be in the “first_project” directory – i.e. the top-most directory of your project):
cordova prepare
The command above takes the changes in the “www” directory and applies them to the “www” directories in the “platforms” folder. That’s right – each platform has its own “www” directory. You shouldn’t edit them directly though – always edit the files in the top-most “www” folder and apply “cordova prepare” command. Later on when you get up to speed you will be able to automate this step if you wish.
Let’s run the app now. This is what we got:
We don’t need Phonegap for that! Why do we need it?
Wait, you say. But we don’t need Phonegap or Cordova for that. We could just add a native WebView in our native project and open our local index.html file in it. Why all this trouble installing it?
You may have guessed the answer. It is the bridge between your web app and native functionality that is interesting. This is where the real power of Cordova comes into play – you can access native functions of your platform.
How do you do that? With a help of plugins. Plugin is a piece of code written in a “native” language – e.g. Obective C, Java or C# – and providing an Javascript API for calling it. You call the functions with Javascript and they are executed natively. You get the result via a callback.
Cordova provides a number of “core” plugins. Often they are created and supported by Cordova team and you can access the basic functionality of mobile devices – Network information, Geolocation, Contacts, Device info and so on.
In addition to that there is a fantastic community that has created plugins for almost any situation you can imagine. Need a Push Notification? In-App purchases? Barcode scanner? They are all just a few clicks away.
Worst case scenario – you cannot find a plugin that fulfils your needs. Then you can relatively easy write your own.
Simple example of using a plugin
Say we want to use the Contact list and add a new contact. For that we will use the Contacts core plugin.
First, add the plugin with the Command Line (again, you need to be in the top-most directory of your project):
cordova plugin add cordova-plugin-contacts
Now you may want to modify the contents of your “www/js/index.js” file. You are interested in changing the function “onDeviceReady”. It is this function that is executed on “deviceready” event. And generally you should wait for that event before executing anything else in your app. Currently this function probably reads like this (it is a part of the “app” object):
onDeviceReady: function() {
    app.receivedEvent('deviceready');
}
You can modify it as follows:
onDeviceReady: function() {
    app.receivedEvent('deviceready');

    var myContact = navigator.contacts.create({"displayName": "Let's Test User"});
    myContact.save(onSuccess, onError);
}
You also need to add the “onSuccess” and “onError” callback functions to this file, you can add it at the end of the file for example:
function onSuccess() {
    alert("Success!");
}
function onError() {
    alert("Error...");
}
Save the file and run already familiar command:
cordova prepare
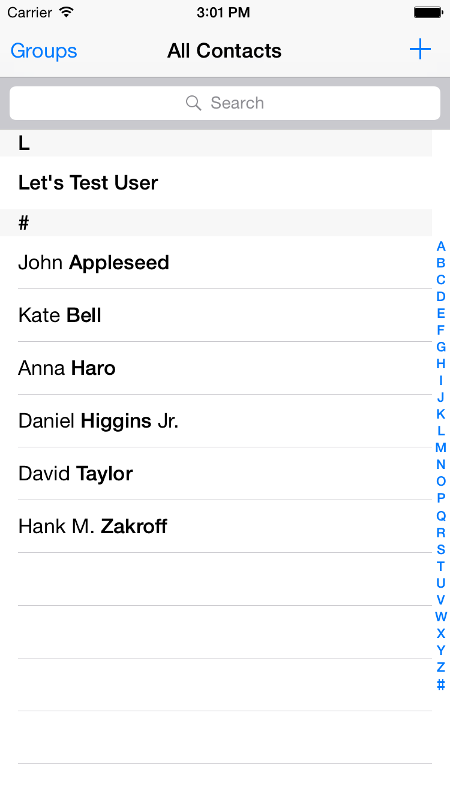
If you run the app with iOS Simulator now, you will be asked for permission to access the contacts. After that, a “Success!” message should be displayed. If you check the contact list of your Simulator now, it should contain a user “Let’s Test User”:
Challenges – Structure
Of course, you will face some challenges if you choose to go a hybrid route. Here I will try to outline a few main ones and what are the strategies to deal with them.
First challenge is the structure of your app. If you develop a native app with Xcode everything is crystal clear – you use the MVC pattern, use the frameworks provided to you by the environment, the code is organised by Xcode for you.
With a web app it is not as clear. Check the contacts example above. If you just start adding functions like that, throw in a bunch of jQuery scripts and perhaps scatter it around a few files, your project will quickly become a mess. You probably don’t want that. Instead, we should take a more structured approach and use some of the existing Javascript frameworks.
For example:
I think using these or similar frameworks can help you a lot in your development process. Moreover, you have the flexibility to create and modify the look of your app in any way you wish.
In some cases though, you may want to go further and use a different type of framework. Some work is done for you there. You get the widgets and UI elements. However you loose the flexibility of styling the app in a way you want – it becomes a harder task. Here they are:
- Ionic (based on Angular.js – very good for Angular.js fans)
- Sencha
- jQueryMobile (I don’t really like how it looks, but you can use some stand-alone functionality of this framework)
It is up to you to choose if you want to style everything yourself or if you would like to use the pre-defined UI elements. Choose the framework correspondingly.
Challenges – Debugging
If you want to go through your application line by line while debugging it – it is still possible. However only in the development mode. For that, you would open the app in the browser of choice and debug it with the developer tools. Luckily, Chrome, Firefox and Safari have very good dev tools now. And if it is not enough, try Firebug with Firefox – it will give you even more tools.
Things get more complicated when you want to test on your device. You can still do that in the browser. However you will need to use additional tools like Adobe Edge Inspect or Weinre. This will allow you to debug and inspect the sources of an app opened in a browser on your mobile. Still ok.
The bad news come when you want to debug a packaged app deployed on your phone. Unfortunately, that is not easy with Cordova/Phonegap. Some time ago I would write it is impossible. However recent developments in GapDebug give me a hope.
The last resort is of course the log output. You cannot conveniently set the breakpoints, but you still can see what is going on under the hood of your app. Not to tell that you would probably use that in your native development too.
Challenges – “small” details
And lastly, there is a number of “small” details that you have to take care of. I write “small” in quotes, because you probably need a whole blog post to discuss each of these challenges. But I will give you some quick hints here too.
First, you need to employ responsive design while creating the app. Recall that you have to take care of tablets and various screen sizes. It is the right time to remember those media queries, isn’t it?
In addition to that, you need to take care of all the retina displays. Gone are the days when you could just use @2x images. With screen pixel density requiring images as big as @3x, you need to use smarter approaches. A “srcset” is a possibility. However it will not work on older devices. Luckily, you can use the Picturefill script that works in a similar way.
Another thing that your web app will not handle out of the box are touches and gestures. To overcome that you could use a library called Hammer. Alternatively you could use a framework that has support for that. For example Sencha.
And one more important thing that I wanted to mention is support for page transitions. As we discussed, we do not want our pages just turn white and then reload as simple web pages. We want them to slide in and out. One way to achieve that is to download standalone transitions from jQuery mobile (they have a feature called “custom download” where you specify functionality for download). Or perhaps you are tagged on implementing your own solution using CSS translate function? That is totally doable too.
Conclusion – native or hybrid?
Since the ideas you have for your app are limited only by your imagination, only you can decide what route to choose. A quick cheat sheet could look like this. Go hybrid if
- You develop a data-driven app
- It will have simple animations (e.g. transitions)
- You want to have a custom branded UI
- You are ready for possible tradeoffs or can combine hybrid with occasional native development
Go native if
- You are planning to use advanced animations (e.g. developing a game)
- Native look and feel is required by you or your customer
- You need specific native functionality requiring high performance (e.g. maps)
And one more important factor is your knowledge and budget. If you are a seasoned web developer, it will be faster for you to develop a hybrid app. And if you are a native developer, perhaps it is better to develop your skills in the native direction.
Finally, whichever route you choose, you should enjoy doing it. And if you have any additional questions – just let me know in the comments!


Leave a Reply