How to use the Command Line like a Pro
The Command Line program will be used a bit different depending on which operating system you are using – Linux, Mac or Windows. In this article I will only discuss *nix systems – i.e. Linux and Mac since they both have lots of things in common when working with a Command Line. Windows are a bit different (though the principles are the same) and therefore a separate article is coming about it. If you are using some other operating system, I will assume that you have enough knowledge about it and will be able to apply the principles discussed in this article too.
Starting the Command Line
The biggest difference of the Command Line on Mac and Linux is that on Mac it is called Terminal and on Linux it can be called Terminal, Konsole or even more specific, like Gnome-konsole. Kidding. If you dig deeper you will be able to spot the differences, but once again, the basics described in this tutorial do not differ much.
First, let’s start the Command Line. Terminal on Mac is located in the Applications folder. Alternative is to just type “Terminal” in the spotlight search.
On Linux, say Debian, you need to start the Konsole program. More detailed info on starting the Command Line on various distributions of Linux can be found here.
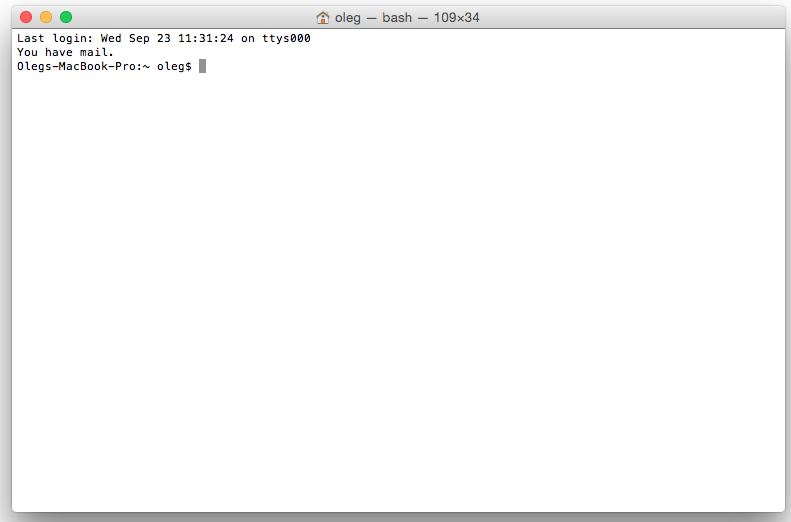
When you have started the Command Line, you will be presented with a black or white (depending on the configuration) window with the input prompt. It can look like this:
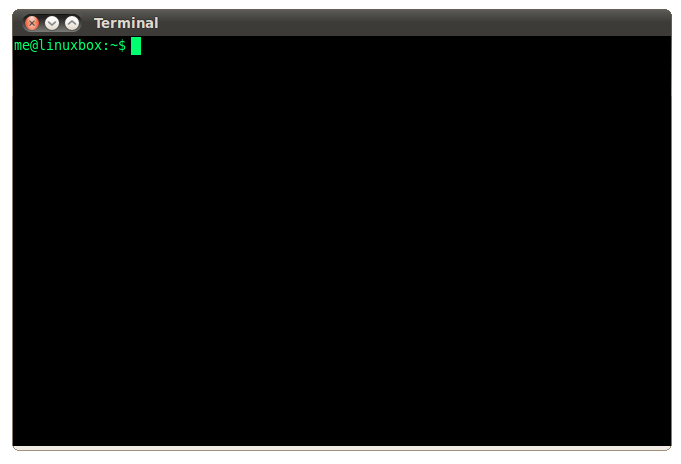
or this:
Now, you can write various commands into the prompt to:
- Navigate the folder structure
- View and open the files
- Search for files and for the text in files
- Start programs
What’s the point? Can’t you do all the same using the graphical user interfaces, simply the windows, of your Mac or Linux? Well, you can do everything but the last item in the list – there are some useful programs written to be specifically used on the Command Line. In addition, in some cases you will not be able to use the graphical user interface – e.g. if you are connected to the remote server that only has the Command Line access. If you are in doubt, take a look at the motivation for using the Command Line in the previous post.
To make the first time introduction easier for you, we will only touch the most important topics for developers – navigating and starting the programs with the Command Line today. Let’s go!
Where are you?
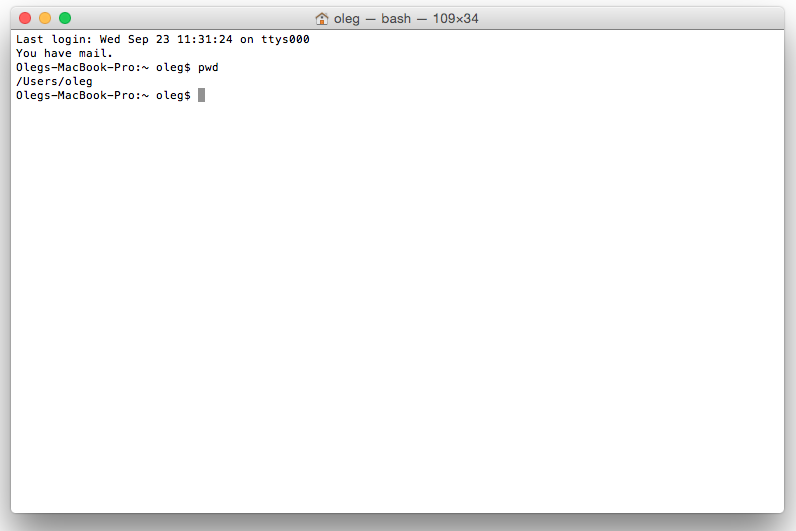
First, when you start the Command Line, you will be “located” in the “Home” directory for the user you are logged in with. Each user on your computer has such a Home directory and it is usually “/Users/YOUR_USERNAME” (Mac) or “/home/YOUR_USERNAME” (Linux). So for example, if my username is “oleg”, my Home directory on Linux would be “/home/oleg” and on my Mac it is “/Users/oleg”. This is an actual, real folder on my computer – I can see it either in Finder, or using the Terminal – just type the “pwd” command into the prompt and press the return button.
Actually, this is how you execute any other command in the Command Line too – you type in the command and press the return button. Similar to double-clicking the mouse, just without one. Try it:
pwd
Navigate with the Command Line
Now, let’s create new files inside our Home directory and navigate around them. Type the following into the command line and press return:
mkdir my_new_folder
This will create a new folder – “mkdir” stands for “make directory”. Let’s move into that directory:
cd my_new_folder/
With this command you will “change directory” (thus “cd” command) into the “my_new_folder”. Let’s create another directory here (it does not have to include word “another” – you can call it anything you want):
mkdir another_directory
And then create a simple file using a “touch” command:
touch my_new_file
Now, let’s check, what do we have in the current directory:
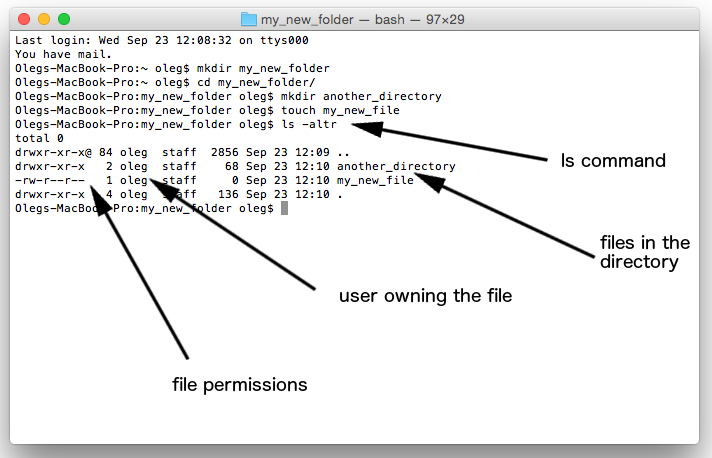
ls -altr
Here, “ls” stands for “list” and it takes a number of parameters. Often, parameters for the commands are prefixed with “-“. Each letter in the above example stands for something: “a” – all information, “l” – long (i.e. detailed) format, “t” – sort by time, “r” – reverse order. You can play around and try using the “ls” command without parameters or with less parameters (e.g. “ls -al”).
This is what I got:
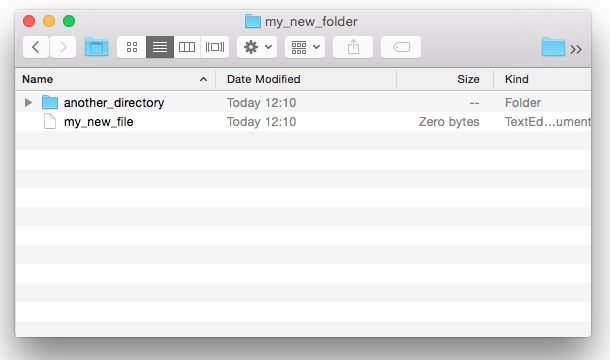
And I can see the same file structure with the Finder:
Now that you can move into some folder and create files in it, you can also move one level up:
cd ..
Here the two dots “..” stand for a directory that is one level up.
Now, try running the “ls -altr” command here and spotting your “my_new_folder” directory. Can you see it at the bottom of the list?
There are more commands that you may need in the future – copy files with “cp” command, move them with “mv”, or remove with “rm”. However I don’t want to overwhelm you with them here. I include some more of them into a brief summary below this article though.
Users and the “root” user
We have already mentioned the concept of users in the Command Line. The notion of “user” is needed to control file access permissions. You were probably forced to create at least one user when setting up your operating system. For example, I have a user “oleg” on my Mac and a Home directory assigned to me – “/Users/oleg”. However if my wife used my computer too, I would create another user for her.
Why is it needed?
Say there are two users of the computer: you and your wife. If you create a file with your user and set appropriate permissions for it, she will not be able to open it. Cool, isn’t it?
Well, unless she has the administrator privileges and can execute commands as a super-user. This user, also called “root”, is always present on the *nix systems. Its file access permissions are unlimited. For example, if your wife used root user to access your secret documents – she could open and modify them. In fact, a standard user may only have permissions to create files under his “Home” directory. However a root user can modify and create files in other directories too. Moreover using the root you will be able to modify and delete the system files. Therefore you need to use caution when operating under root user and as a general rule you should not do that.
There are however situations when you actually NEED to do that – operate the command line as a root. For example, if you are installing some software (e.g. Sass described in the previous tutorial). One of the ways to do that is to prefix usual commands with another command – “sudo” (i.e. “super-user do”). This will allow you to execute a command with higher, root, permissions. This is how you do that:
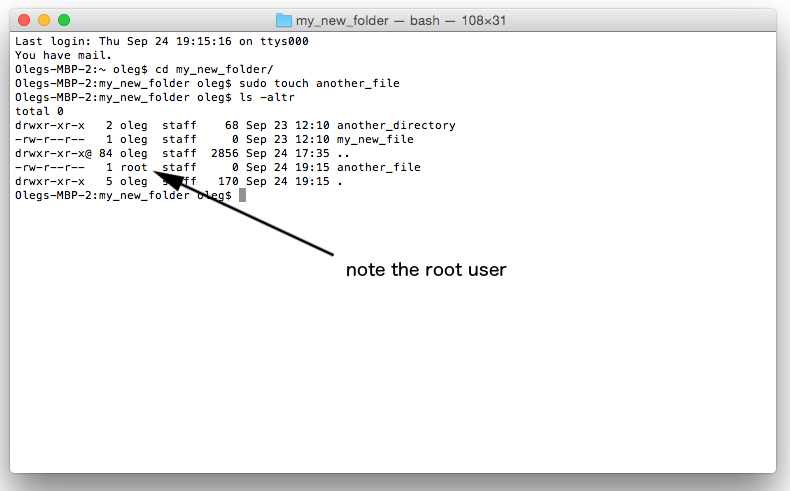
sudo touch another_file
Here you add a “sudo” command before the usual command – in this case “touch”. Then you will be prompted for the password of your user – the command is executed only after this authorisation step. If we run the “ls -altr” command now, we will see that the file was created under the root user.
Different notions for the directories
We have already seen that the directory being one level up from your current one is denoted with two dots “..”. It is worth mentioning what other directory notions exist.
Take the path “/Users/oleg” as an example. The first slash “/” in this path denotes the “root” directory, i.e. the top-most directory of your folder structure. If you have enough permissions, you can change into that directory:
cd /
To change back into your Home directory, you will need to use the tilde “~” – this is a shortcut for your Home folder.
cd ~
(check where you are with the “pwd” command).
And the last thing to mention here – your current directory is denoted with one dot “.”. It is used in order to start executable files in your current directory. But let’s discuss it in the next section.
Starting the programs
Finally, we came to the most important part of the tutorial. It is briefly mentioned in the post Why to use the command line, however is worth going deeper here.
You can start different programs with the command line. For example, I have Firefox installed on my Mac, under the /Applications/Firefox.app. In fact, the Firefox.app that I have is not a single file – it is a collection of files, and one of those files is the actual Firefox executable. I can start a new instance of a Firefox application by double-clicking the Firefox.app icon. Or by running the following command in the terminal:
/Applications/Firefox.app/Contents/MacOS/firefox
What I did here was writing a path to the executable file and pressing the return button. I could have changed into the “/Applications/Firefox.app/Contents/MacOS/” directory first (it would become my current directory) and then execute the “firefox” file:
cd /Applications/Firefox.app/Contents/MacOS/
./firefox
Not that you should stop double clicking your Firefox icon now. However, there are some applications that are designed to be run from the command line. You cannot use such programs any other way. One example of such program is Git. Git is a Command Line application. There are visual applications for Git – SourceTree, GitEye, giggle – so called Client applications. However these client applications are NOT Git. Instead, they all run the same executables that the command line tool does (though a client might be using not the latest version of the git). Therefore pressing that “push” button in your Git client is equivalent of running the following terminal command:
git push
Other examples of the Command Line only applications are Phonegap/Cordova, Node, Sass, Less, Maven. Most of them are essential if you develop for web. My aim is to help you to start using these tools. And for that you need to understand how to use the Command Line. Which you hopefully do by the end of this article.
And there is $PATH too
Before we proceed, I would like to introduce one more Command Line related topic – the environment variable $PATH. Each operating system has a number of so called environment variables. Some can be created by a user, but some can be counted on to exist by users or applications, as, for example, $PATH.
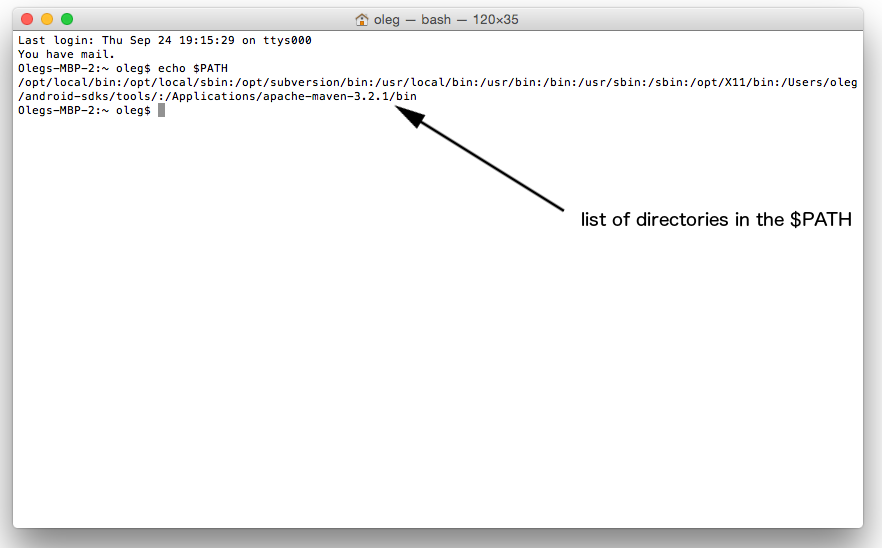
$PATH is a collection of directories where the Command Line is looking for executables. You can see this collection of directories if you execute the following command:
echo $PATH
This helps to explain why to start Firefox I used the current directory symbol, the dot – “./firefox”, and for the “git push” command I was able to omit it. This is because Git was automatically added to one of the $PATH directories during the installation process and Firefox was not (since the user is expected to start it by just clicking the icon).
In fact, Git executable was added to the directory “/usr/bin” (which is in the $PATH as you can see above) and I could have called the same command in the following way instead:
/usr/bin/git push
However it is common to just prefer the shorter and more convenient “git push” command.
Summing it all up
Today we have covered two topics – navigating with the command line and starting the programs with the command line. Why these two topics?
Well, because it is the bare minimum you need to know in order to use the Command Line tools. You don’t need to be able to copy or remove files with the Command Line. You don’t need to understand scripting. But you need to be able to:
- Start the Command Line
- Navigate from the Home directory into any other directory (say, your project location)
- Start the Command Line tool of interest (say Sass).
I did my best to explain these steps. If you have any questions though, please let me know in the comments!
And the last bonus for you:
Cheat sheet for Command Line commands
Write out the current path:
pwd
Create a directory DIR_PATH:
mkdir DIR_PATH
Change location into the directory SOME_PATH:
cd SOME_PATH
Create a file FILE_NAME:
touch FILE_NAME
List the files in the current directory:
ls -altr
Execute command SOME_COMMAND as super-user:
sudo SOME_COMMAND
Copy a file from FILE_INIT_PATH to FILE_PATH_AFTER_COPY:
cp FILE_INIT_PATH FILE_PATH_AFTER_COPY
Move a file from FILE_INIT_PATH to FILE_PATH_AFTER_COPY. FILE_INIT_PATH will be removed:
mv FILE_INIT_PATH FILE_PATH_AFTER_COPY
Remove the file at FILE_PATH:
rm FILE_PATH
Remove the directory DIR_PATH (needs the -r parameter meaning “recursive”):
rm -r DIR_PATH
Hope that is enough to get you started. Stay tuned! (FB and Twitter)


Leave a Reply